How to Change BitLocker Password on Protected Drive in Windows 10/11

If you want to change your BitLocker password on a Protected Drive or a protected drive in Windows 10 or Windows 11, then here is how you can do it. In this article, I will explain three ways to do this: using Control Panel, using Command Prompt, PowerShell or using Windows Terminal. I will explain all the methods in detail. You can follow any of these methods to change the BitLocker password.
How to Change BitLocker Password on Protected Drive
To change the BitLocker password on the Protected Drive in your Windows 10 or Windows 11, follow one of the following methods below.
1. Using Control Panel
This is the easiest to use option for changing or changing the BitLocker password on any protected drive in a Windows 10 or Windows 11 computer. However, this article describes the process of making changes to the C drive in Windows 11. It is possible to change the PIN or password on Windows 10 to other drivers use the same steps.
Let’s start the steps to do it.
- Open Control Panel by pressing the button Win + Rthen type control and press Enter.
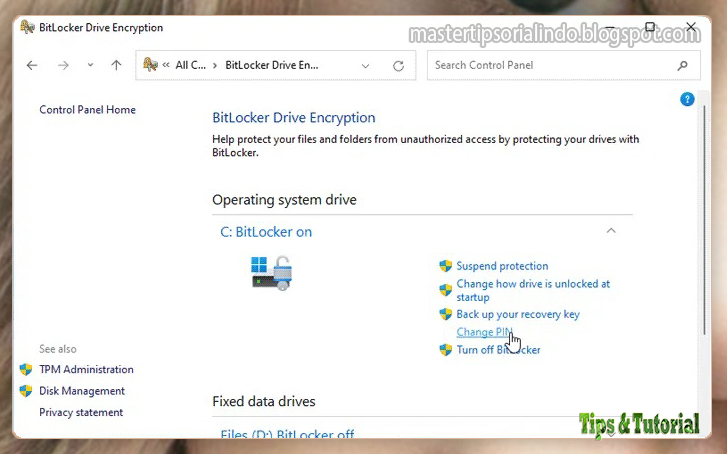
- In the Control Panel window, change View by the Large/Small icons and select BitLocker Drive Encryption.
- Then, find protected drives and click options Change PIN.
- Next, you must enter the old PIN with New PIN twice.
- Finally, click Change PIN. Your BitLocker password will be updated soon.

If you wish to use one of the following two methods, you have two options. First, you can open Command Prompt or Windows PowerShell with the standalone version of admin rights. Second, you can open Windows Terminal with admin rights and then switch between Command Prompt and PowerShell.
2. Using Command Prompt
To use the Command Prompt method, follow these steps.
- Press the button Win + Rthen type cmd and press Ctrl + Shift + Enter to open a Command Prompt window with admin rights. Or open Windows Terminal with admin rights and choose Command Prompt.
- Then, in the Command Prompt window, enter the command the following and press Enter. Don’t forget to replace C with the drive letter of your BitLocker protected drive.
manage-bde -changepin C:
- Then, you need to enter new PIN twice to confirm.

3. Using Windows PowerShell
The commands for the Command Prompt and Windows PowerShell methods are the same. Follow the steps below to do this.
- Open Windows PowerShell with administrator rights first. You can use Search Windows to find it, then right click on it and select Run as administrator. Windows 10 only, press the key Win + X and select Windows PowerShell (Admin). Or you can also open Windows Terminal with admin rights and select PowerShell.
- In the PowerShell window, enter the command the following and press Enter. As usual, C is the drive letter of the BitLocker protected drive.
manage-bde -changepin C:
- Then, you have to enter PIN or new password twice to save changes.

Once done, you can use the new password to unlock the drive.
That’s my article this time, hopefully it will be useful and help you in changing the BitLocker password on the protected drive in your Windows 10 or Windows 11. Don’t forget to leave your comments below to share your thoughts and experiences in following this tutorial. If you find other solutions not mentioned above, then don’t forget to share. Thank you and GBU. UNITE AGAINST COVID-19!!

Posting Komentar untuk "How to Change BitLocker Password on Protected Drive in Windows 10/11"