How to Switch Between BitLocker Hardware-Based and Software-Based Encryption

BitLocker offers two different types of encryption. In this article, I’ll help you switch between hardware-based and software-based encryption for fixed data drives. It is possible to switch between the two encryptions using the Local Group Policy Editor and Registry Editor on your Windows 10 or Windows 11 PC. However, your computer must support hardware-based encryption in order for you to use this change.
How to Switch Between BitLocker Hardware-Based and Software-Based Encryption
To configure and switch between hardware-based and software-based encryption for fixed data drives, you can use one of the methods below.
1. Using the Group Policy Editor
To switch between hardware-based and software-based encryption for fixed data drives using the Group Policy Editor, follow the steps below.
- Press the button Win + Rthen type gpedit.msc and press the button Enter to open Group Policy Editor.
- In the Local Group Policy Editor window, browse the following path below this.
Computer Configuration – Administrative Templates – Windows Components – BitLocker Drive Encryption – Fixed Data Drives
- At location, double click on policy Configure use of hardware-based encryption for fixed data drives in the right pane.

- In the policy edit window, select Enabled.
- You can then view and enable the following two policy settings in the Options section.
- Use BitLocker software-based encryption when hardware encryption is not available.
- Restrict encryption algorithms and cipher suites allowed for hardware-based encryption.
- you can activate one of the settings by checking the appropriate option box.
- Finally, click Apply and OK to save changes.

2. Using Registry Editor
- Press the button Win + Rthen type regedit and press Enter to open Registry Editor on your Windows 10 or Windows 11.
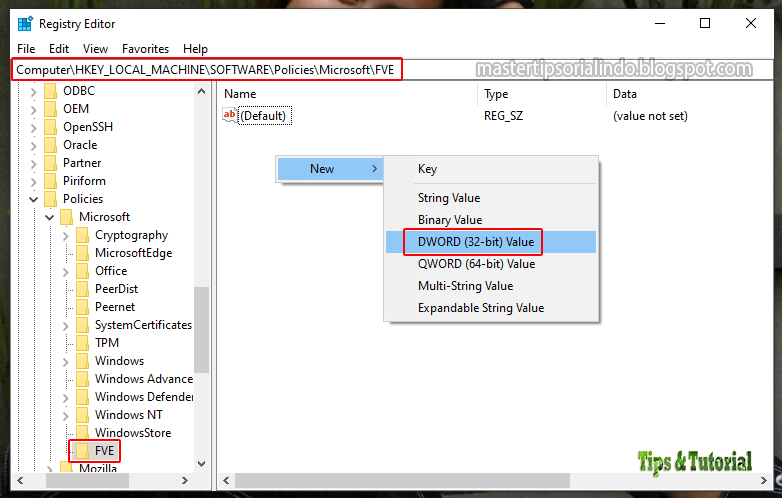
- In the Registry Editor window, browse the following path below this.
HKEY_LOCAL_MACHINE\SOFTWARE\Policies\Microsoft
- At the location, you need to generate a new key. Therefore, right click on Microsoftthen select New – Key and name it with FVE.

- After that, you need to blind three DWORD. Therefore, right click on FVE or empty space in the right pane, then select New – DWORD (32-bit) Value and name it with the following.
- FDVAllowSoftwareEncryptionFailover
- FDVHardwareEncryption
- FDVRestrictHardwareEncryptionAlgorithms
- After that, double click on each other DWORD which you did above, then change value data Becomes 1 and click OK to save your settings.
- After it finishes, right click on FVE or empty space in the right pane, then select New – Expandable String Value and name it with FDVAllowedHardwareEncryptionAlgorithms.

- Furthermore, double click at him, then change value data as below and click OK to save your settings.
2.16.840.1.101.3.4.1.2;2.16.840.1.101.3.4.1.42

- Finally, close the Registry Editor window and restart your computer.
BitLocker can use hardware encryption as long as your computer has this facility. If hardware-based encryption is not available on your computer, BitLocker can use software-based encryption. Be it for removable drives or fixed drives, the policy is the same for all.
That’s it for this tutorial. Hope this is useful and helps you in switching between BitLocker Hardware-Based and Software-Based Encryption on your Windows 10 or Windows 11. Don’t forget to leave your comments below to share your thoughts and experiences in following this tutorial. Thank you and GBU. UNITE AGAINST COVID-19!!

Posting Komentar untuk "How to Switch Between BitLocker Hardware-Based and Software-Based Encryption"